
You can save time and money by changing your mobile phone’s battery on your own. You can solve the issue at home rather than spending a lot of money on repairs or waiting days for a service. You can revive your phone without going over budget if you have the correct tools and a little perseverance. You can save money and time by replacing your battery yourself, saving you the trouble of going to a repair service. It’s also a terrific method to cut down on electronic waste and prolong the life of your phone. This book will assist you at every stage if you’re prepared to attempt something new!
Your cell phone cannot function properly without a working battery. Without it, your phone might not turn on at all, run out of battery quickly, or shut down without warning. Compared to purchasing a new phone or paying for expert repairs, changing the battery is an easy approach to restore your phone’s functionality and save money. For people who wish to easily fix their phones themselves, DIY replacement is a fantastic choice. With simple steps and unambiguous instructions, this guide is intended for novices. You’ll discover everything you need to securely and confidently change your battery, even if you’ve never done it before.
Why Consider Replacing Your Battery Yourself?
Cost Savings
Compared to hiring a professional to fix your phone, replacing the battery in your phone yourself can save you a lot of money. Repair businesses frequently charge labor in addition to the battery, which can significantly raise the total cost. A do-it-yourself method, on the other hand, just costs you a few tools, many of which are reusable, and the replacement batteries. You may avoid the extra costs and use the money you save to improve your equipment or meet other demands by learning how to replace it yourself.
Convenience
The ease of DIY battery replacement is among its greatest benefits. You might have to schedule an appointment, drive to the shop, and occasionally leave your phone there for days if you depend on a repair shop. This outage might be annoying, particularly if you depend on your phone for communication or work. Using a do-it-yourself method gives you the flexibility to change the batteries whenever it’s convenient for you. In little time at all, you’ll be able to use your phone from the comfort of your own home.
Sustainability
Replacing batteries on your own also helps create a more sustainable future. You can prolong the life of your phone and cut down on electrical waste by changing the battery rather than throwing away the entire device. Every little step matters in the fight against the growing global problem of electronic waste. Reusing your phone reduces the environmental impact because less resources are used to build new gadgets. You can get the most out of your phone and contribute positively by adopting this eco-friendly strategy.
Signs Your Mobile Battery Needs Replacement
Rapid Battery Drainage
Even with little use, if you find that your phone’s battery drains considerably more quickly than it used to, it’s a clear sign that the battery isn’t properly charged. For instance, the battery may be losing its capacity to store energy effectively if it drops from 100% to 50% in a matter of hours. As batteries age, they usually experience rapid energy drain, which means they can no longer power your phone for extended periods of time and require more frequent charging.
Problems with Overheating
Another warning indication that your phone’s battery might be about to die is overheating. Even when charging or using several apps at once, a phone battery shouldn’t overheat during regular use. But if your phone starts to warm up when you’re doing basic things like reading your messages or surfing the web, it can be a sign that the battery isn’t functioning well. It is even more crucial to deal with the problem as quickly as possible because excessive heat can further harm the battery and other internal parts.
The Phone Is Not Charging
When your phone doesn’t seem to keep a charge no matter how long you leave it plugged in, it can be one of the most annoying problems you could encounter. Your phone’s battery may no longer be able to sustain a full charge if you notice that it charges to 100% but quickly loses power or if it doesn’t fully charge even after hours of being plugged in. This might be the result of deterioration on the battery’s cells, which over time lose their capacity to hold a charge.
Unexpected Closings
One of the most concerning indicators that your phone’s battery needs to be changed is unexpected shutdowns. If your phone abruptly shuts off even when there is a good amount of battery life left, it may be a sign that the battery is no longer able to provide steady power. This frequently occurs when the battery’s power management system malfunctions or it is unable to supply the proper voltage. As the battery ages, these shutdowns may occur more frequently, interfering with your phone’s dependability.
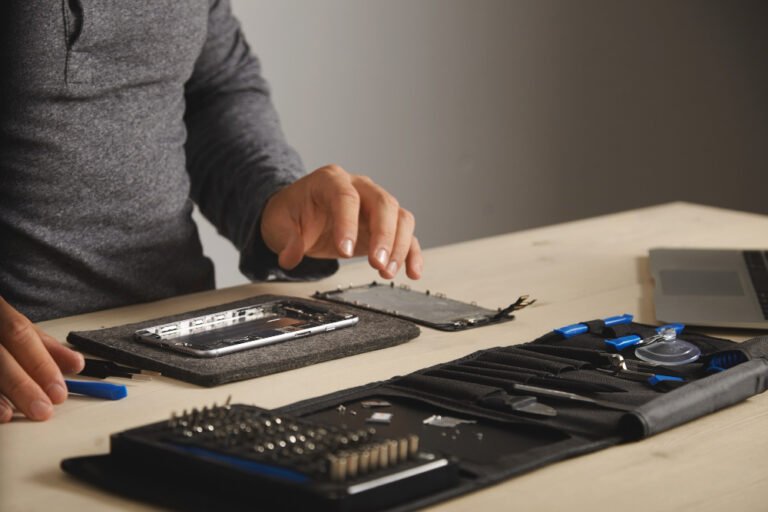
Tools and Materials You’ll Need for DIY Mobile Battery Replacement
It’s crucial to assemble the necessary equipment and supplies before beginning the battery replacement to guarantee a seamless procedure. The following is a list of essentials:
Screwdrivers
To remove the screws on your phone, you’ll need a small set of precision screwdrivers. The Phillips and Pentalobe screwdrivers are the most frequently required. With the help of these small screwdrivers, you may carefully and damage-free remove the phone’s back panel and any internal parts.
Spudgers
A spudger is a flat, plastic instrument that aids in separating parts, like the battery and screen of a phone, without scratching or breaking the device. It’s particularly helpful for carefully and gently pulling away bonded parts.
Tools for Plastic Pry
Though they are made for particular purposes, including opening the casing or lifting delicate parts like the screen, some gadgets resemble spudgers. They aid in avoiding unintentional chips or cracks.
Tweezers
When handling small, sensitive parts like screws or connectors, tweezers are used to prevent damage or loss during the repair procedure. When working with small parts, precision is provided by fine-tipped tweezers.
Tool for Suction Cups
With the use of this tool, you may remove your phone’s screen from its body. It gives you a firm hold on the screen so you can raise it without breaking or damage it.
Strips of Adhesive
To secure the new battery inside your phone, you’ll need adhesive strips. After the battery has been attached, these strips are used to fix it in place and keep it there.
A new Battery
Buying the appropriate replacement battery for your phone model is essential. Your phone may malfunction or possibly sustain damage if the battery is installed incorrectly. To guarantee compatibility, always verify the model number and specifications. Choosing a high-quality new battery is crucial for your phone’s durability and functionality following repair.
Ejector Tool for SIM Cards (Optional)
Before beginning to change the battery in certain phones, you might need to take out the SIM card tray. To remove the tray safely and damage-free, use a SIM card ejector tool.
Important Tip: Prior to buying tools or new batteries, always read reviews and specifications. Online kits that include every necessary tool for the task are available, so you can be sure you have everything you need in one place.
Safety Precautions Before Starting
Turn the Device Off
Make sure your phone is fully off before starting to replace the battery. In order to avoid any unintentional electrical shorts or internal component damage, this step is essential. The phone’s screen or other components may malfunction if you leave it on while working on it. To ensure your safety throughout the process, always turn off your device.
Operate in a Static-Free Setting
Your phone’s delicate internal components may sustain damage from static electricity. It’s crucial to work in a static-free environment to prevent this. To safely release any static electricity, you can utilise an anti-static wrist strap. As an alternative, work on a surface that isn’t carpeted and stay away from apparel that produces static electricity. Additionally, a neat, level workstation lowers the possibility of unintentional drops or phone damage.
Take Care When Handling the Battery to Prevent Punctures or Fire Hazards
Be very careful not to puncture or damage the battery when handling it. Commonly found in cell phones, lithium-ion batteries are delicate and can catch fire if they are damaged. The battery should never be bent, crushed, or punctured. Do not attempt the replacement if you observe any swelling or leakage from the battery. In these situations, dispose of the damaged battery safely by adhering to local electronic waste disposal laws.
Step-by-Step Guide to Replacing Your Mobile Battery
Step 1: Turn Off the Phone and Backup Your Data
Make a backup of all of your phone’s vital data, including contacts, messages, and images, before you begin. This guarantees that no information will be lost in the process. To prevent any electrical hazards and guarantee a safe working environment, turn off your phone entirely after backing up your data.
Step 2: If Applicable, Remove the Back Cover
While some smartphones have a sealed body, many have a detachable back cover. If the back cover of your phone is detachable, carefully remove it with your fingers or a plastic pry tool. You’ll need to utilise a suction cup tool to raise the screen or back panel of phones with sealed bodies. To prevent damage or cracks, carefully work your way around the edges.
Step 3: Carefully Unscrew and Disconnect All Internal Components
After removing the rear cover, you’ll probably notice a number of screws holding internal parts in place. Carefully note where these screws are located and use the proper screwdriver to remove them. Make sure not to damage any wires or connectors, including the display or battery connector, by using a plastic spudger to detach them after the screws have been removed.
Step 4: Remove the Old Battery in Step Four
Now that the internal parts have been carefully disconnected, the old battery may be taken out. The battery is held in place by sticky strips on some phones and by screws or clips on others. Using a plastic pry tool or spudger, carefully lift the battery, being careful not to distort or puncture it. If the battery is stuck, the adhesive can be loosened with a little heat, such as with a hairdryer.
Step 5: Make Sure the Connection Is Secure by Installing the New Battery
Make that the connector on the new battery fits the phone’s motherboard by placing it in the same spot as the old one. To keep it in place, gently press it down. Make sure the adhesive strips are correctly placed and attach securely if the battery requires them. To guarantee a secure connection, reattach any cables or connectors you had previously disconnected.
Step 6: Put the Phone Back Together and Test It
Start putting your phone back together when the new battery has been installed and firmly linked. Reattach any pieces you previously removed and carefully reinsert the screws. Turn the phone on to make sure that the new battery is functioning properly before fully sealing it. Verify that your phone charges as anticipated by checking the battery %. After you are pleased, make sure all the parts are in place and securely close the phone.
Common Mistakes to Avoid When Replacing Your Mobile Battery
Using Inappropriate Equipment
Using the incorrect tools for the job is one of the most frequent errors. You risk breaking minor parts or damaging your phone if you use the wrong screwdrivers, pry tools, or spudgers. Using the appropriate tools, made especially for mobile phone repairs, is crucial. To prevent breaking your phone’s fragile internal components, make sure you have a set of precise screwdrivers, plastic pry tools, and a spudger.
Failure to Verify Battery Compatibility
Make sure the replacement battery is compatible with the model of your phone before buying it. Performance problems like overheating, quick drain, or even internal phone component damage might result from using the wrong or subpar battery. Always purchase a battery from a reliable vendor and make sure it fits the requirements of your phone.
Ignoring the Need to Backup Vital Information
Although it’s simple to overlook, backing up your data is one of the most crucial things you can do before changing your battery. You run the danger of losing important data, including contacts, images, and app information, if something goes wrong during the replacement procedure. Before beginning the repair, always make a backup of your data to the cloud or an external storage device.
Disregarding Safety Procedures
Serious repercussions may result from failing to take the appropriate safety precautions. Electrical damage, harm, or even a fire hazard might arise from not shutting down your phone, not using a static-free environment, or handling the battery improperly. To prevent punctures or leaks, always turn off your phone, work in a spotless and static-free environment, and handle the battery carefully.
When to Seek Professional Help
If the Battery on Your Phone Isn’t Removable
The design of many contemporary cellphones incorporates non-removable batteries. It can be challenging and dangerous to try a do-it-yourself replacement if your phone fits into this group. To prevent breaking the phone or voiding the warranty in these situations, it is best to get professional assistance. The delicate task of securely changing non-removable batteries can be handled by qualified professionals who have the necessary equipment and knowledge.
If There Is a Warranty on the Device
A DIY battery replacement attempt could nullify your phone’s warranty if it is still in effect. In order to preserve warranty coverage, the majority of manufacturers advise obtaining service from an approved repair facility. Before doing any repairs, it’s a good idea to confirm with the manufacturer or your service provider whether your phone is covered in order to prevent the warranty from being voided.
For Difficult Repairs Including Physical Damage or Water
The process of replacing your phone’s battery may become more difficult if it has physical difficulties like a cracked screen or a bent frame, or if it has been subjected to water damage. In certain situations, the damage can make it difficult to install the battery or have an impact on how well the phone works. Before trying to replace the battery, it is advisable to have these problems fixed by a professional repair shop.Expert repair specialists are able to evaluate the general state of your phone and guarantee a safe and efficient battery replacement.
Frequently Asked Questions
Can I Replace My Phone’s Battery Myself?
You can change your phone’s battery on your own if you have the necessary equipment and follow the right instructions. Although it calls for accuracy and caution, doing it yourself can save money and time. A suction cup, tweezers, a spudger, tiny screwdrivers, and appropriate replacement batteries are required. Make sure you are working in a static-free environment and that your phone is off. To prevent any damage or voiding the warranty, it is imperative that you obtain professional assistance if your phone has a non-removable battery or is still covered under warranty. Contact iPhone Repair Newcastle for professional assistance; our experts are available to help.
What Tools Do I Need for a DIY Battery Replacement?
For a DIY phone battery replacement, you’ll need several tools, including:
- little screwdrivers (Pentalobe, Phillips)
- Spudger made of plastic
- A suction cup
- Tweezers
- Ejector for SIM cards
- Plastic pry tools
- A new battery
- Hair dryer or heat pad
Is It Safe to Replace My Mobile Battery?
If done correctly, changing your phone’s battery can be safe, but it takes the right equipment and expertise. It can be a do-it-yourself project if you have the required tools and are at ease with electronics. There are dangers, though, like breaking internal parts, voiding warranties, or running into problems like battery leaks. To guarantee safety and correct installation, it is best to have professional assistance if you are hesitant. To prevent safety risks like explosions or overheating, always select high-quality replacement batteries.